
Welcome to our beginner’s guide on how to customize your WordPress theme.
WordPress is a powerful platform for building websites, and its flexibility allows you to create a website that suits your unique needs.
In this guide, we’ll take you through the step-by-step process of customizing your WordPress theme, from choosing a theme to editing theme files or hiring a developer.
By the end of this guide, you’ll have the knowledge to create a professional-looking website that stands out from the crowd.
So, let’s get started!
Why customize the WordPress theme
A fully customized WordPress website gives a unique look and attracts the audience.
Customizing your WordPress theme is essential to creating a unique and professional-looking website that represents your brand or business.
It allows you to modify the appearance and functionality of your website, so it stands out from the millions of other WordPress sites out there.
Customization also helps to improve user experience, making it easier for visitors to navigate and engage with your site.
By customizing your WordPress theme, you can create a website tailored to your specific needs and goals, whether increasing conversions, improving engagement, or simply making your site more visually appealing.
Overall, customizing your WordPress theme is crucial in creating a successful website that represents your brand or business in the best possible way.
Therefore, it is important to customize your WordPress website to give you a unique representation and match your brand.
In this article we will see the three best methods for customizing the WordPress theme:
- Using the WordPress theme customizer
- Using the WordPress page builder Elementor
- Using Custom HTML and CSS
Choosing WordPress Theme
Before customizing the WordPress theme, it is necessary to install the theme to your WordPress website.
You can choose the theme which matches best your requirement and brand.
There are thousands of themes available in the WordPress directory.
WordPress themes come in different styles, colors, and layouts.
You can choose from free or paid themes, depending on your budget and requirements.
So, now let’s see how to install and activate the WordPress theme.
Install and Activate Your WordPress Theme
Installing a theme to the WordPress website is very easy.
So, let’s see how to install the WordPress theme step by step.
Once you have chosen your theme, install and activate it on your WordPress site.
To install the theme go to the appearance > theme.
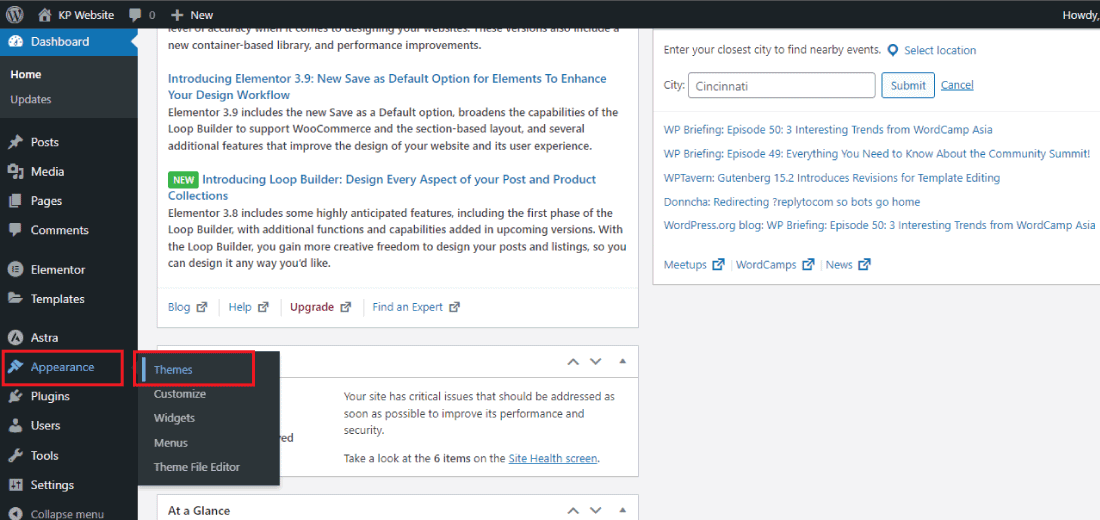
Now click on the “Add New” button to add the new theme to your WordPress website.
Here for the demo purpose, we have installed and activated the Astra theme.
It is a fast and light theme and is used by most WordPress developers for its lightweight features.
Customizing WordPress theme: Using Theme Customizer
Almost every WordPress theme comes with a customization feature, where you can customize your WordPress theme easily.
It allows you to modify various aspects of your theme, such as the colors, fonts, and layout.
For customizing the WordPress theme go to the appearance > customize.

After clicking on the “Customize” tab, the theme customizer gets open.
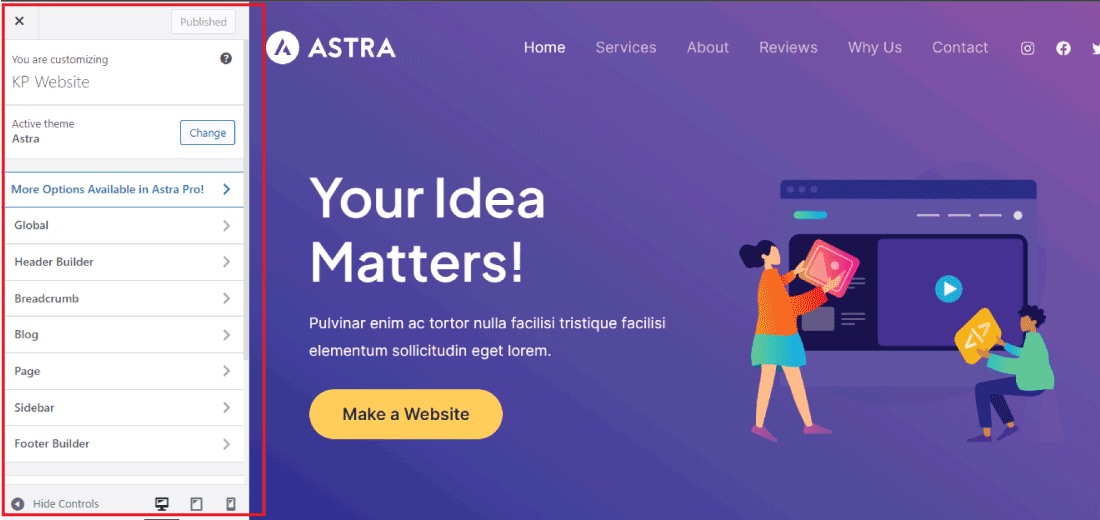
Now you can customize the elements by choosing or selecting them.

This is how you can customize your theme using the WordPress default theme customizer.
Now, let’s see how we can customize the theme using the WordPress plugin Elementor.
Customizing WordPress theme: Using WordPress Plugin Elementor
You can also use the plugin for customizing your theme, Elementor is one of the popular plugins used by WordPress users.
It is a drag-and-drop page builder that allows you to customize the page or theme without any coding knowledge.
In this page builder, you will get a very user-friendly interface with the help of anyone who can easily customize the pages whether he is a beginner or an advanced user.
To use Elementor, you first need to install and activate it on your WordPress site.

Once you’ve done that, you can start customizing your site using the following steps:
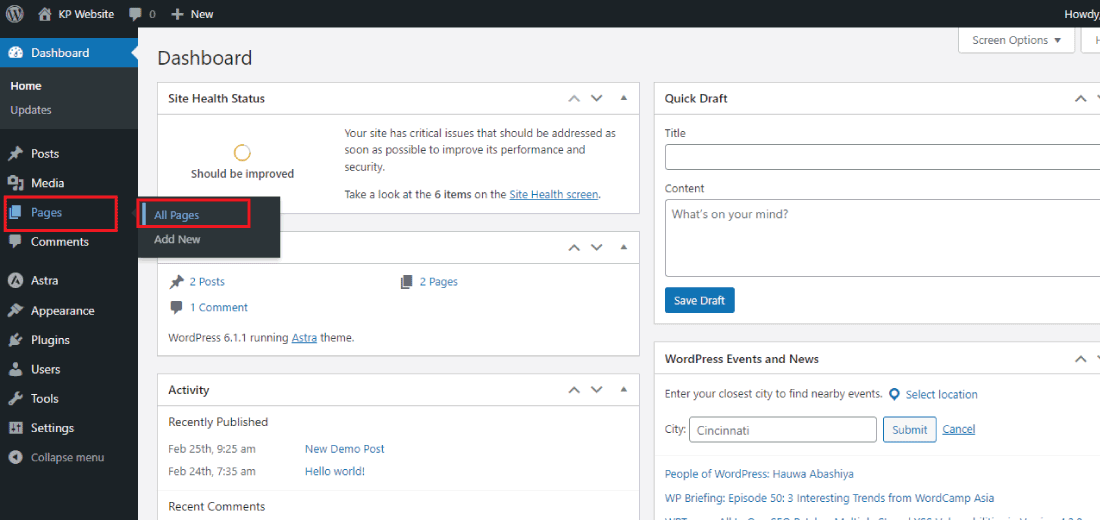
- First, go to the page which you want to customize. Go to Pages > All Pages.

- Once you have the page which you want to edit or customize. Then launch the Elementor by clicking on the “Edit with Elementor” button.
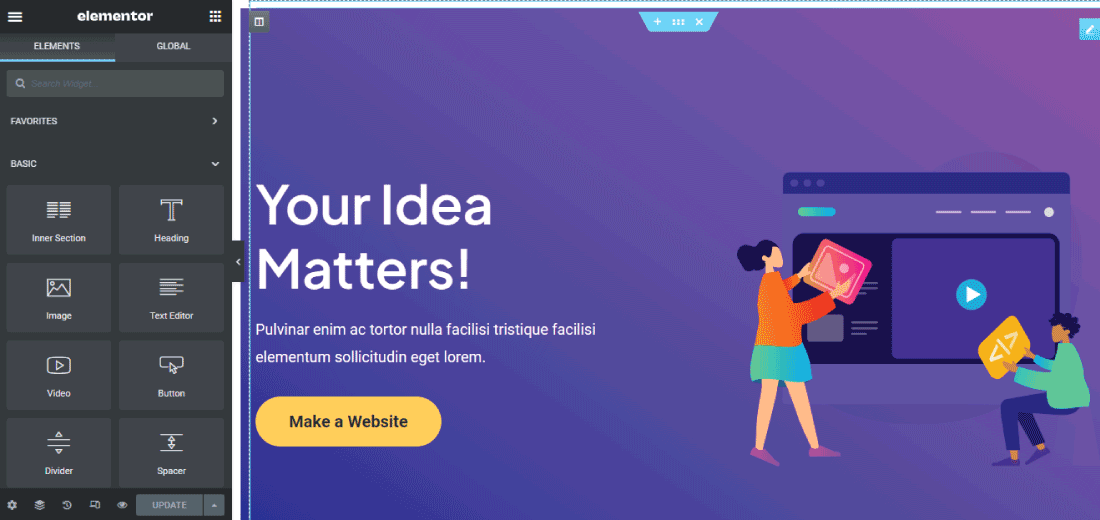
- Now the Elementor customizer will open on your window screen, you can also use the prebuilt template for making the custom page.
- Once you’ve chosen your template or started from scratch, you can start customizing your page using the Elementor editor.You can add new elements, such as text, images, and videos, or edit existing ones by simply clicking on them and making changes.
- After customizing your page, if you filled satisfied with your customization then click on the update button to make all changes live on your website. Elementor provides a range of customization options that allow you to create a unique and professional-looking website without any coding knowledge.Using this plugin, you can easily customize your WordPress theme and create a website that stands out.
These are the steps for using them so you can customize your WordPress easily.

 Elementor provides a range of customization options that allow you to create a unique and professional-looking website without any coding knowledge.Using this plugin, you can easily customize your WordPress theme and create a website that stands out.
Customizing WordPress theme: Using Custom HTML & CSS
Using custom HTML and CSS is another way to customize your WordPress theme.
While this method requires some coding knowledge, it provides greater flexibility and control over your site’s appearance and functionality.
To use custom HTML and CSS to customize your WordPress theme, follow these steps:
1. Create a Child Theme: Before making any changes to your theme’s files, it’s important to create a child theme.
This ensures that your customizations don’t get overwritten when your theme is updated.
You can create a child theme by following the instructions on the WordPress Codex.
2. Locate the Relevant Files: Once you’ve created a child theme, locate the files you want to customize.
These could include the style.css file for styling changes, the header.php file for changes to your header, or the functions.php file for adding custom functionality.
3. Make Your Changes: Open the file you want to customize and make your changes using HTML and CSS.
You can use your browser’s inspect tool to identify the specific HTML and CSS you need to modify.
4. Save and Preview: Once you’ve made your changes, save the file and preview your site to ensure everything looks and functions as expected.
Using custom HTML and CSS provides a powerful way to customize your WordPress theme, but it does require some coding knowledge.
If you’re not comfortable with coding, consider using a drag-and-drop page builder or hiring a developer to make the changes for you.
If you are searching for the best themes then read this post: 11 Best WordPress Magazine Themes of 2022
Conclusion
Customizing your WordPress theme is a crucial step in creating a professional-looking website that stands out from the crowd.
Whether you’re a beginner or an advanced user, there are several ways to customize your WordPress theme, including using drag-and-drop page builders like Elementor or customizing your theme’s files using HTML and CSS.
By customizing your WordPress theme, you can create a website that is tailored to your specific needs and goals, whether that be increasing conversions, improving engagement, or simply making your site more visually appealing.
Customization also helps to improve user experience, making it easier for visitors to navigate and engage with your site.
Overall, whether you choose to use a page builder or customize your theme’s files using HTML and CSS, taking the time to customize your WordPress theme can help you create a successful website that represents your brand or business in the best possible way.
